How to reverse anodizing with Multi-Etch
Here is an interesting method for an extractive coloring technique using Multi-Etch.
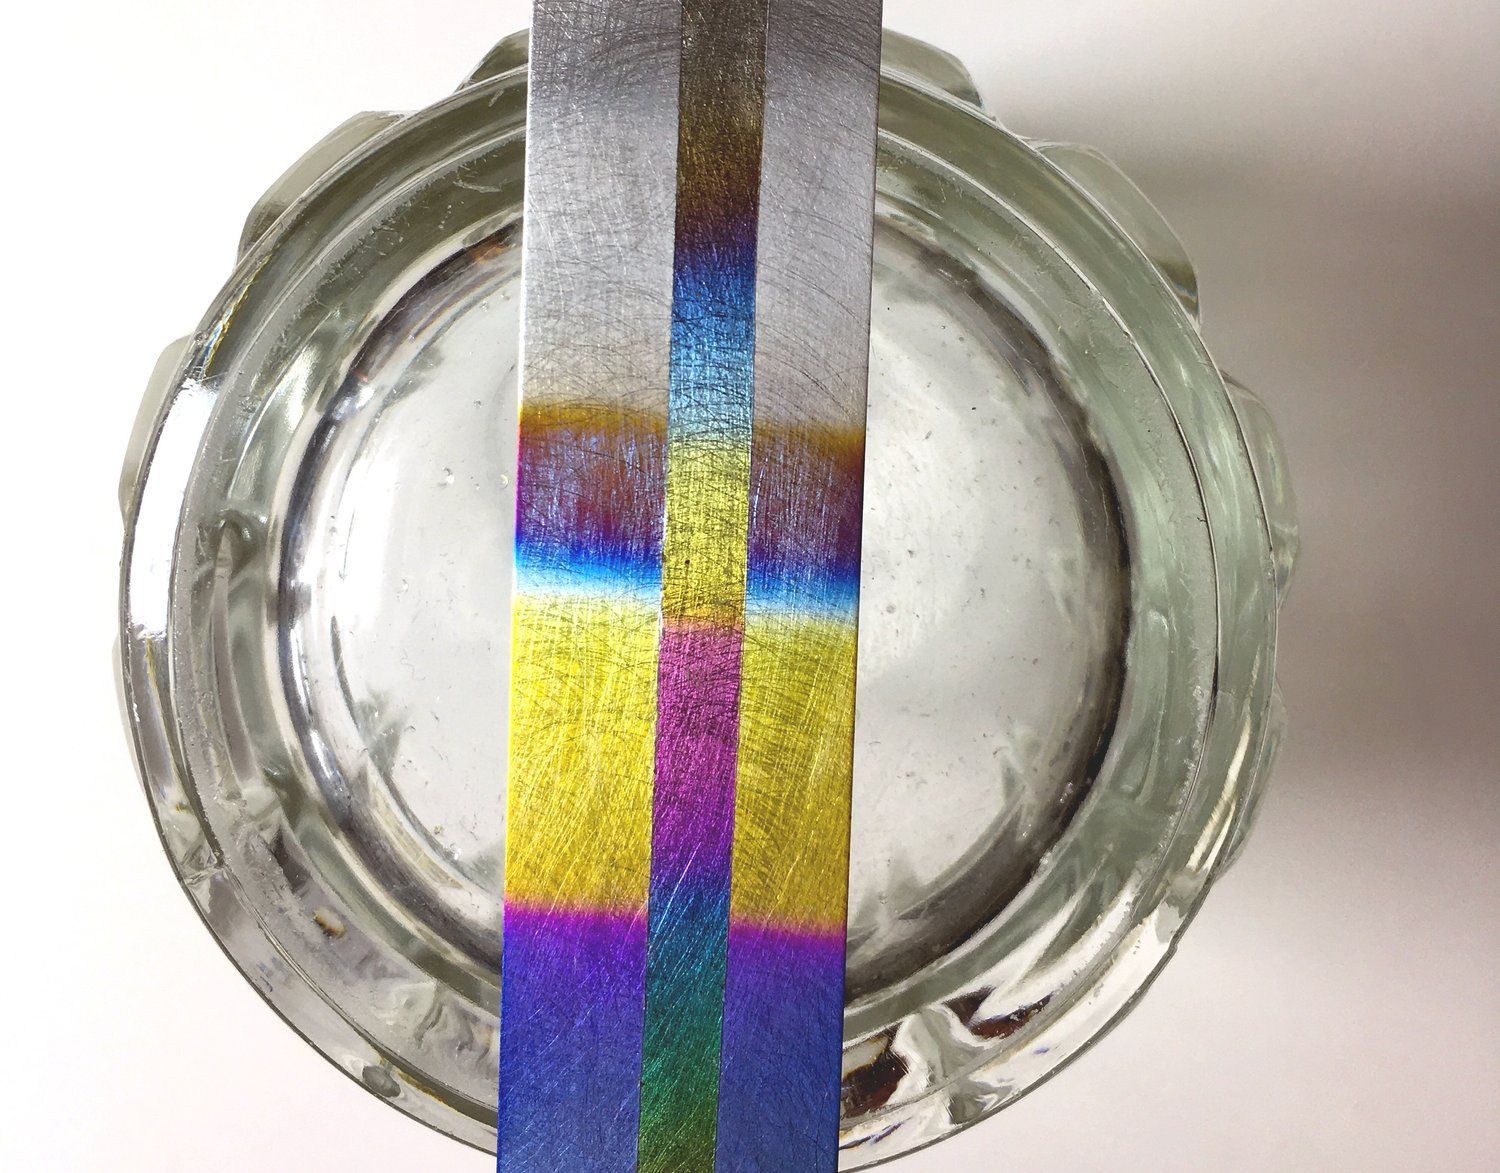
Perhaps you’ve gone beyond that color you wanted when anodizing titanium or niobium, i.e., the voltage you applied was too high and the coloration needs correcting. You wanted a nice yellow but hit the pink fuchsia range above it.
Rather than completely erasing the color, it is possible to Multi-Etch the anodized item and work backwards to the color you wanted. It takes some practice and skill working with this technique but it can produce the colors you're after.
A quick demonstration:
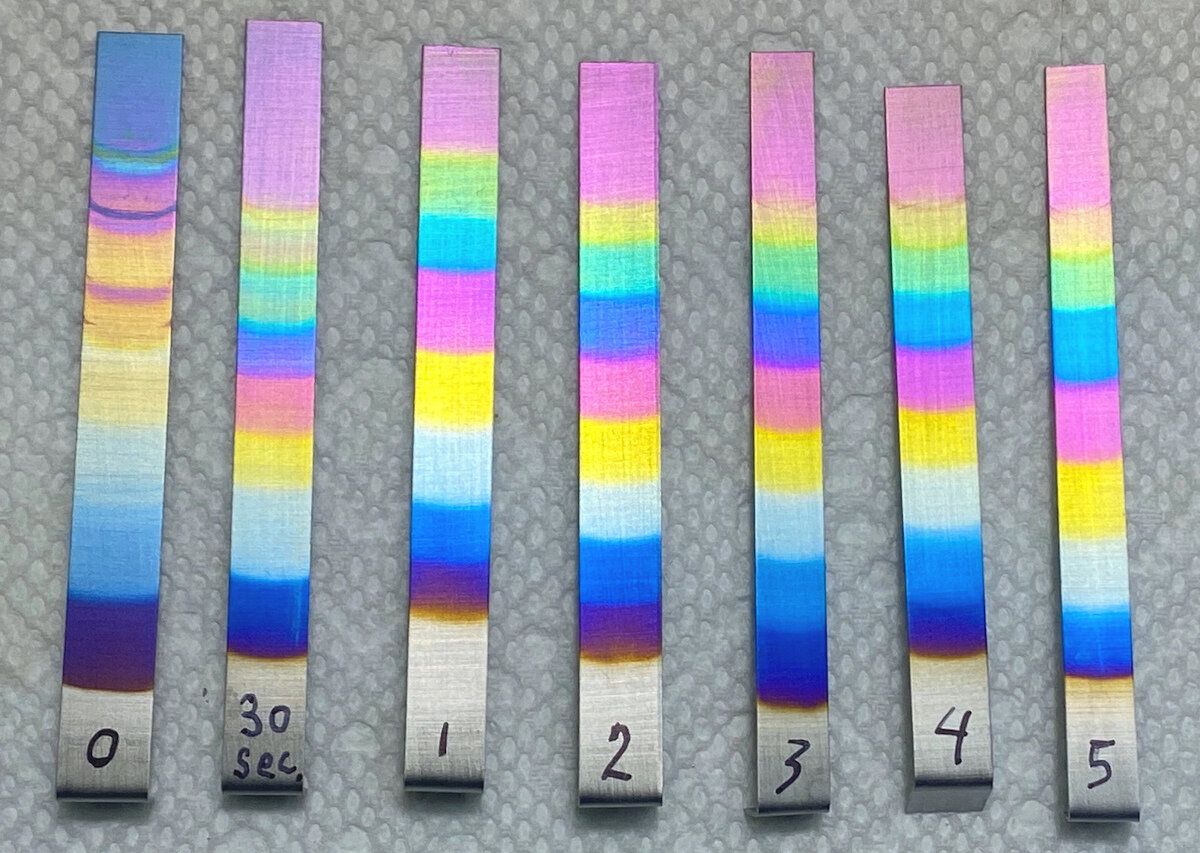
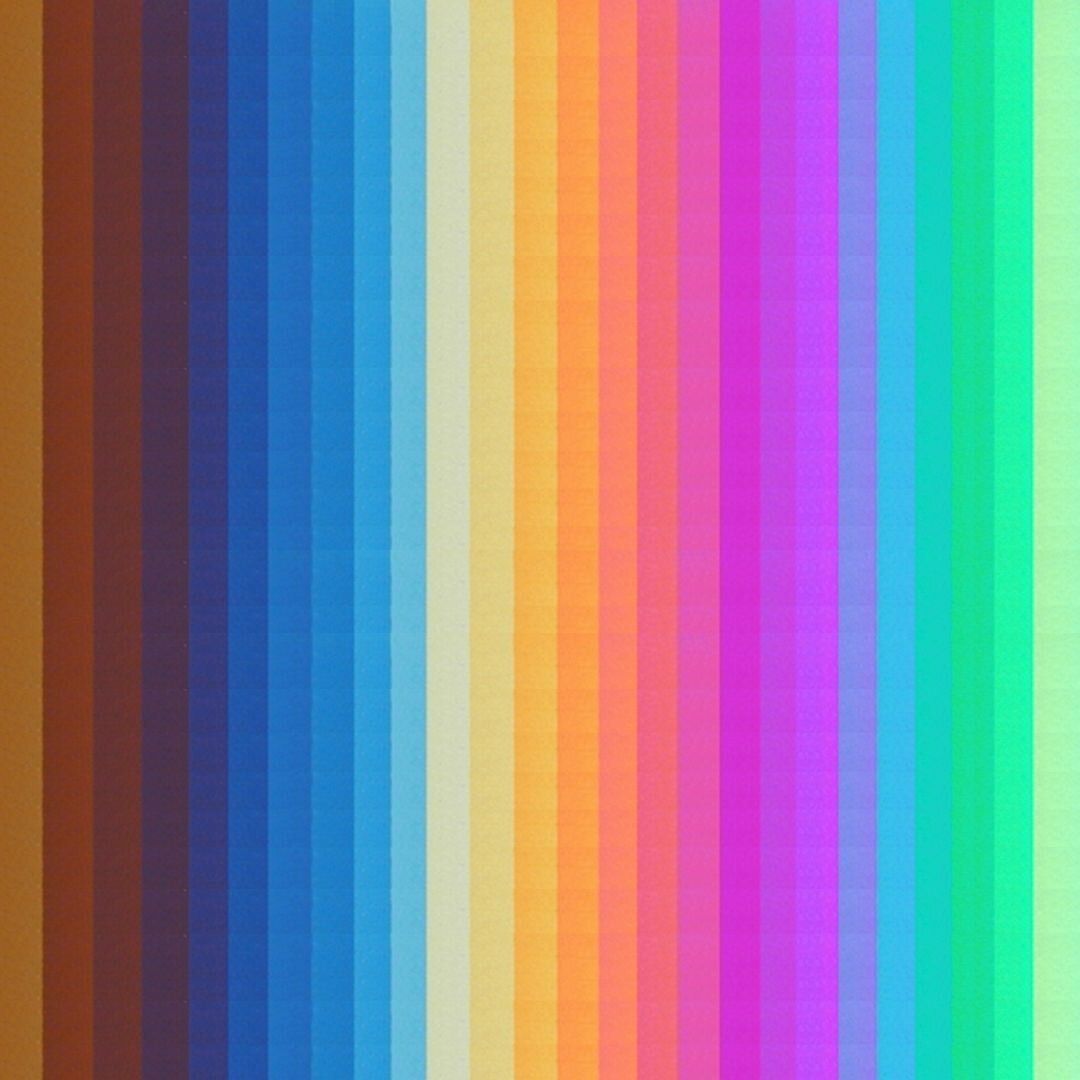
Use a test strip you’ve anodized and immerse it in heated Multi-Etch. You will observe the color work backwards through the lower order colors. For example, the fuchsia will turn to yellow and then to blue, etc.
When you get to your target color, immediately remove the workpiece from the Multi-Etch bath and rinse it. Room temperature Multi-Etch can also be used for this but the changes will be slower.
A second method with re-anodizing
Alternatively, you could go below the color range you’re after and then re-anodize to your target color instead of erasing completely and starting over. For example, maybe you wanted purple but went past that and got turquoise. You can etch back to yellow and then re-anodize to purple.
Here's a demonstration of that:
We know of some artists that use this extractive method routinely.
Painting with Multi-Etch
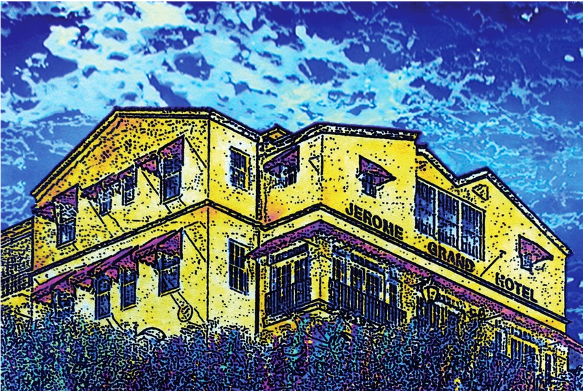
For more complex colorings, instead of dipping the whole piece, Multi-Etch can also be selectively applied with a sponge or paint brush. If you need to protect the surrounding areas, mask them with electroplaters tape, rubber cement, or nail polish.
In the piece above, tape has been used to mask off the middle prior to the use of Multi-Etch.
Remember, always test a new technique with scrap until you get the hang of it.
And keep in mind that until you remove your workpiece and rinse off the Multi-Etch, it will continue to change the color.
Happy etching!