0

HEATED

HEATED MULTI-ETCH


We recommend using Multi-Etch heated because it’s faster. The Multi-Etch bath should be heated to 150-160 degrees F. Multi-Etch works best if it has been mixed up 24 hours before use. 


High temperature rated polypropylene tanks and containers work best for large etch tanks. You can also use our High Density Polyethylene Jug to activate your Multi-Etch.


Check out our How to Videos including How to Anodize Titanium


THE PROCESS

STEP 1 - ACTIVATION

REQUIRED: When you first open your Multi-Etch bags you must activate for initial use. See Activation Instructions below.


STEP 2- SAFETY EQUIPMENT

Put on goggles, gloves, etc. Set up your anodizing station close to where you will be etching. Do this with a fume hood operating, in a very well-ventilated area, or outdoors.

STEP 3 - PRE-CLEAN

Clean your titanium pieces with Simple Green®; if they are particularly dirty with oil or grease, clean with acetone or rubbing alcohol and then follow up with Simple Green®.

STEP 4 - ETCHING

Make sure your bath temp is between 150-160 Degrees F. Dip into Multi-Etch bath and swish or swirl your titanium part(s) for 7-10 seconds.


Immediately rinse in distilled or deionized water.

STEP 5 - ANODIZING

Anodize right away: set voltage to zero and ramp up slowly to the desired voltage/color.

Check out How to Anodize Titanium video.


STEP 6 - FINISHING

Rinse and dry to avoid water spots. If you're not ready to anodize, store the etched parts in distilled or deionized water to prevent reformation of the natural oxide layer.


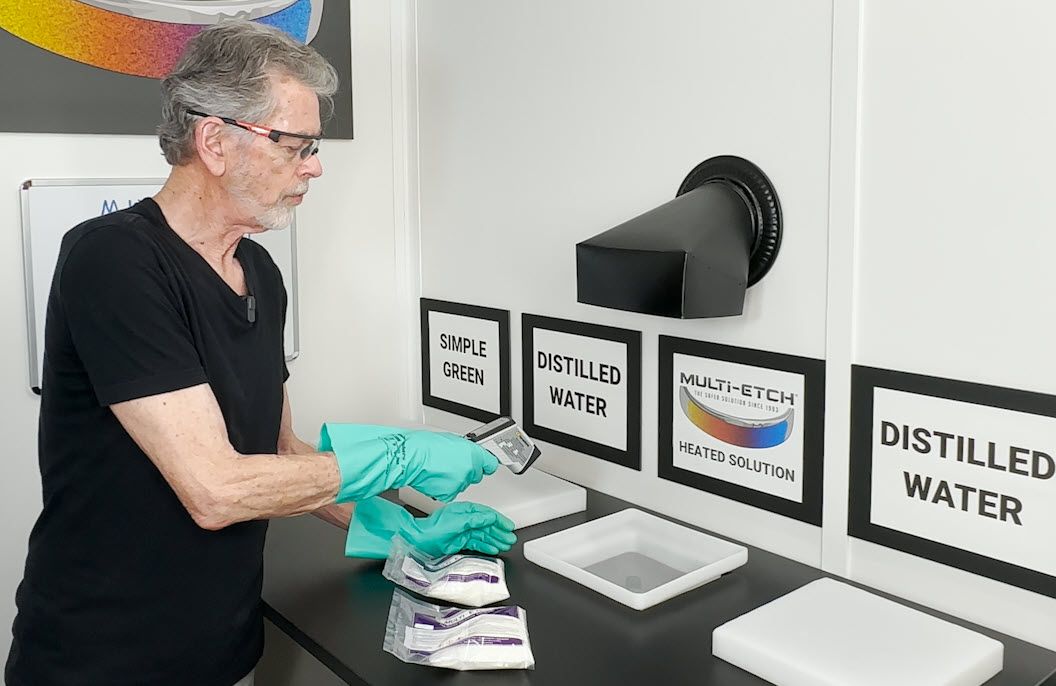
ACTIVATING MULTI-ETCH HEATED USE

Activating Multi-Etch is a one-time required step whether you etch using a heated bath or a room temperature bath. You will receive your Multi-Etch in individual bags in dry powder form. Each bag is used to make 1 gallon of bath (e.g. if you have a 5-gallon tank you will need to mix with 5 bags of Multi-Etch). In order to activate Multi-Etch, you must combine all the powder with distilled or deionized water until completely dissolved.


Activating Steps:

  1. Pour the distilled or deionized water into the tank or container, one gallon for every bag of Multi-Etch.
  2. Heat the water to 150 - 160 degrees F.
  3. While water is heating and before opening the bags, carefully press out any lumps in the powder for easier pouring.
  4. Check that water has reached temperature of 150 - 160 degrees F. Now cut open and slowly pour the Multi-Etch powder into the water; use a funnel if mixing in a jug. YOU MUST MIX THE ENTIRE PACKAGE.
  5. Mix the bath using a polypropylene or other appropriate stirrer, or cap and shake the jug vigorously, to help speed up dissolving the powder.
  6. Mix or shake every few hours to help the solution fully activate. Cover and let stand overnight.
  7. At the start of a working session be sure to heat bath back up to 150-160 degrees F before you start etching.


We hope these steps helped you use our amazing product! If you had any issues please check out our Frequently Asked Questions or feel free to contact us with any concerns.


FAQs

  • How long will Multi-Etch last?

    For dry powder, at least 11 years. For unused Multi-Etch in solution: at least one year (keep it capped)!

  • How much titanium will one gallon of Multi-Etch etch?

    Approximately 5,000 square inches of titanium when dipped for 7-10 seconds at 150–160°F. As you etch, the etchant gradually becomes ineffective and contaminated with titanium ions that can re-plate to the metal, causing uneven anodizing.

  • How do I know when the Multi-Etch solution is used up?

    The short answer is that the etchant is still working if you’re able to get good color. If you are working on one-offs or something special it’s best to use fresh etchant. But if you need to etch with used etchant, first check for good color by etching and anodizing some titanium scrap of the same type/alloy as your workpiece. For more details, see our guide on keeping etch times consistent with Multi-Etch.

  • Can the effectiveness of Multi-Etch be restored after it has been used?

    No, that’s why it’s best to use only as much as you need in any one sitting, leaving the rest unadulterated.

  • What should I use to hold the piece I am etching?

    Use titanium or niobium wire bent around the piece to be anodized, or strung through a hole in the piece. You can also make plastic holders by drilling holes in plastics marked 5 or some marked 7. Affix a handle if you want or suspend the holder from a wire made of titanium or niobium.

  • How do I dispose of spent Multi-Etch?

    This varies based on federal, state, and local wastewater regulations, but is generally much easier than disposing of hydrofluoric acid. Consult a wastewater expert where you live to determine what is allowed, or read our disposal page for details.


TROUBLESHOOTING

  • Why am I not getting any color on my etched titanium?

    If there isn’t any change in color, check your connections. After using many techniques to anodize since the 1970s, sometimes we still get our wires crossed!

  • Why is the anodized color on my titanium pieces splotchy in places?

    1. Did you mix the entire amount of Multi-Etch powder? The ingredients in Multi-Etch are not blended so you must mix the entire amount with 1/2 gallon of distilled or deionized water for double-strength or one gallon for regular strength.
    2. If you are using Multi-Etch unheated, you must heat the entire solution one time, 120–160°F—then you can use it right away or wait for it to cool to room temperature, 70°F. Check out our resource video for Using Multi-Etch Unheated.
    3. Make sure you have de-greased the metal before etching. If the metal is really dirty, e.g., after tumbling, etch once, rinse well, and etch again. Hold the pieces by the edges so that you don’t leave fingerprints.
    4. Did you accidentally contaminate your etching bath? If you introduce brass, copper or iron into the etching bath, those materials will tend to plate onto the titanium and interfere with anodizing. If that happens, you will need to throw out your contaminated etching bath and start with a fresh one. These contaminants could come from the tooling you use to form your piece--files, saws, etc. If possible, keep a separate set of tools or clean the piece with an ultrasonic before etching.
    5. What are you holding the titanium with while anodizing? Using something other than titanium or niobium as hanging/holding wires when anodizing can prevent the voltage getting to the titanium. Some metals, such as copper, brass, gold, etc. will draw off the voltage. Some people use a plastic container with a titanium or niobium probe to anodize--this works great for anodizing lots of small parts
    6. Make sure you rinse well after etching the metal. If you drag Multi-Etch into your anodizing bath, it can inhibit good color. If you are not going to anodize immediately after etching, protect the clean surface by applying a 10-volt color. If you don’t want to anodize at all, then store the etched pieces in distilled water. This will allow you to wait months if necessary, before anodizing.
    7. What alloy and form of titanium are you using? Our experience is mostly with grades 1 and 2 “commercially pure” titanium sheet and wire. Sometimes the ends of a batch of wire or sheet have a heat oxide that is very hard to remove. You also can’t see it! But if you suspect that might be the problem because most of the pieces in a batch anodize fine, try etching the “bad” pieces longer and avoid using the high-voltage colors if possible. The aircraft grade — 6/4 — usually colors well with minimal etching.
    8. Cast titanium parts like medical implants sometimes have a whitish alpha-case from heat which must be mechanically removed (e.g., sand-blasting) If this is not removed, it may be difficult or impossible to anodize evenly with higher voltage colors. Try etching longer before anodizing.
    9. Grow the oxide slowly. If you’re aiming for the color at 70 volts, start at 60 and, while leaving the piece in your anodizing bath, keep the voltage at 60 and see if the color continues to advance to the higher voltage color. If it doesn’t, try increasing the voltage slowly.
    10. What is your anodizing solution? We use 1 tablespoon of ammonium sulfate per gallon of distilled water. You can get ammonium sulfate wherever gardening supplies are sold. You can also use TSP-PF, available at big box and hardware stores. Start with ⅛ cup per gallon of distilled water. If the anodizing reaction is too slow, add a little more TSP. For a bath of either ammonium sulfate or TSP, you can squirt a little dish detergent or Simple Green to act as a surfactant, which is important when you are after a smooth gradation from one color to another. Without that, sometimes the liquid “beads up” when lifting the titanium out of the bath. If burning or pitting occurs while anodizing, particularly at higher voltages, then the electrolyte has been mixed too strong. DO NOT ANODIZE WITH Multi-Etch, sulfuric acid, or detergents with fancy spot retardants.
    11.  It’s possible that if you purchased distilled water in a plastic jug that has been sitting around the store awhile, the water may have absorbed something from the plastic jug itself. Try using water from one of those purified water vending machines.
    12. Poor color can be a sign that you haven’t etched long enough or you have used up the etchant and need to replace the bath. See our guide on keeping etch times consistent with Multi-Etch.
    13. If you wire-brushed the metal or used other steel tools, make sure you have thoroughly cleaned any contaminants from the titanium pieces before etching.
    14. Using Multi-Etch at room temperature (70°F) requires heating the whole bath to 120–160°F one time. Make sure you mix double strength (½ gallon distilled or deionized water.) Shake the container before heating.

    Sometimes everything is “correct” but you still can’t get even color in the higher voltages. This can be due to inconsistencies on the metal itself. High-voltage colors are the hardest colors to achieve so if you have a choice, choose a lower voltage color, especially for the problem pieces.

Share by: